Stage 3: Our Floor Sanding & Restoration Process
Our Sanding Process
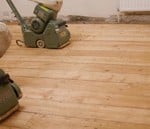
Once our floor sanding Surrey experts have prepared the floor, including securing floorboards and clearing the surface of any protrusions, we assess the floor to determine the best sanding approach. This begins with determining the types of abrasives are needed to sand the surface of the wood. Generally, we use a coarse
sanding belt with 40-grit sandpaper when we initially sand the floor. When a floor has significant stains, including paint and discolouration, we use courser 24-grit sandpaper to remove dirt and imperfections on the surface. This sanding process will leave your floor clear of dirt and ready for the refinishing and restoration process.
Our Finishing Process
After sanding the floor, the wood is left with a very course finish. In order to get the wood smooth and clean, we re-sand the floor with finer sandpaper. Typically we will finish off with very fine 120-grit sandpaper.
We take our time using various types of fine abrasives to ensure the surface is as smooth as possible and ready to apply stains and seals to get a professional, restored look that meets your requirements.
Our Sanding Equipment
GJP Floor Sanding Surrey uses the best abrasives and sanding machines to ensure a professional end-product that you, and our staff, can be proud of. We use virtually dust-free sanding equipment, including German-made Hummel sanding machines. We also use Swedish-made Bona machines and abrasives, which feature industry-leading vacuum and dust extraction systems that leave very little dust.
Although our equipment is virtually dust free, they can still be loud. If you decide to resurface and refinish your floors, we recommend that you inform your neighbours, especially during the sanding process. As a courtesy to you and your neighbours, we also restrict our work from between 9:00 a.m. and 5:00 p.m. in order to keep any disturbance to a minimum.


